OVERVIEW:
The following article will guide you through configuring your email
on an Android device, iOS device, Blackberry device, Windows Mobile
etc.,


REQUIREMENTS:
Before you start, be sure you have the following handy:
Your domain name: example.com
Your email address: johndoe@example.com
Your email account password.
Your mail server name.
***IMPORTANT NOTE*** REPLACE ALL MAIL.YOURDOMAIN.COM OR *****.MAILSHELTER.COM WITH THE VPS IZZYMAIL MAIL SERVER NAME PROVIDED IN YOUR TECH SUPPORT SHEET
1A. CONFIGURE YOUR MAIL ACCOUNT ON ANDROID MOBILE DEVICE (Kitkat OS):
1. Click on the Applications / Menu button on the Home Screen of your Android Device
2. Open the ‘Email’ Application.
3. Select the Account Type as either ‘POP’ or ‘IMAP account’. (Recommended Configuration – IMAP)
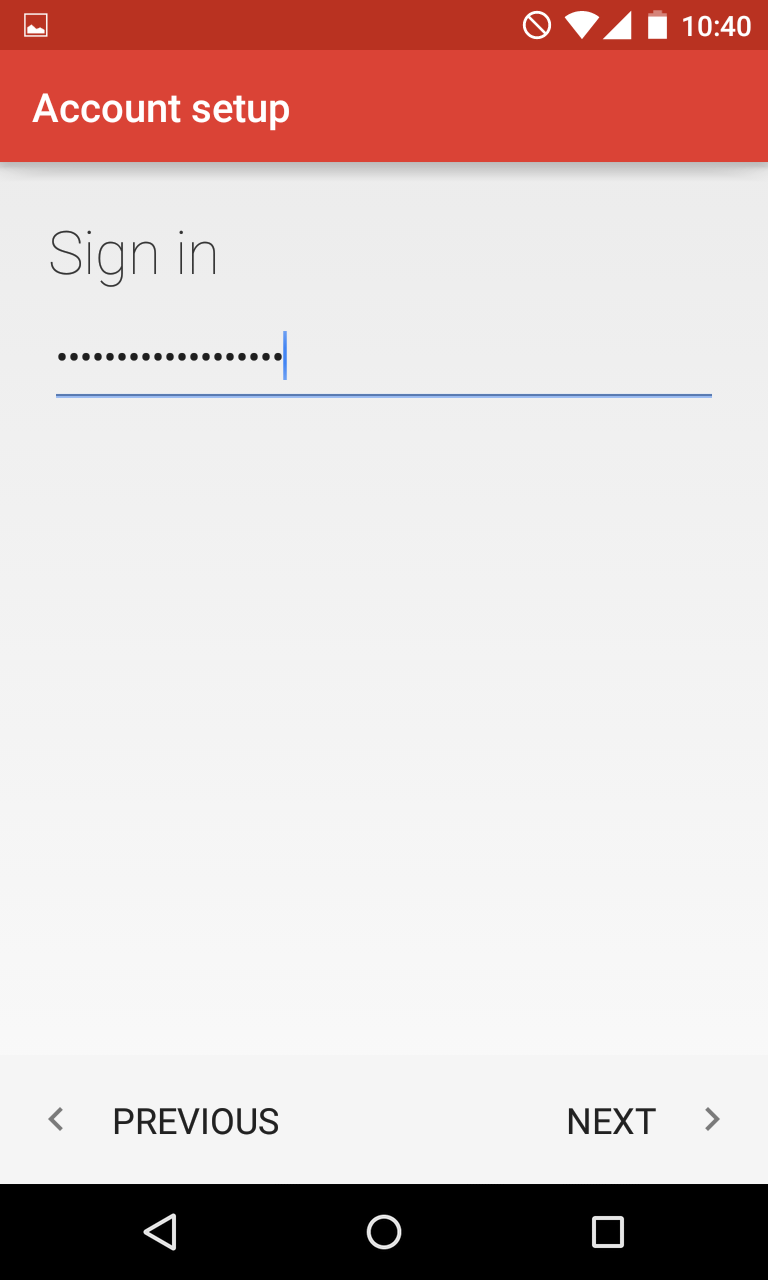
4. Enter your Email address & Password > Click on Next
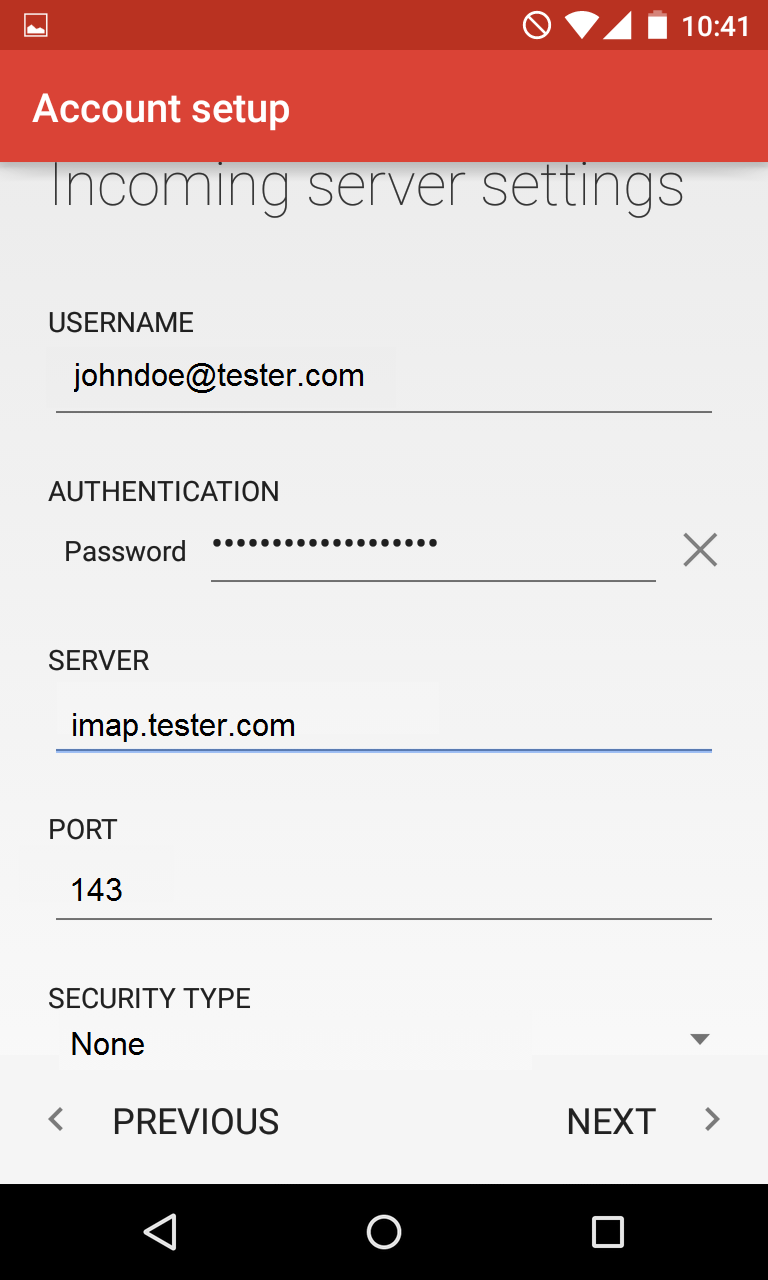
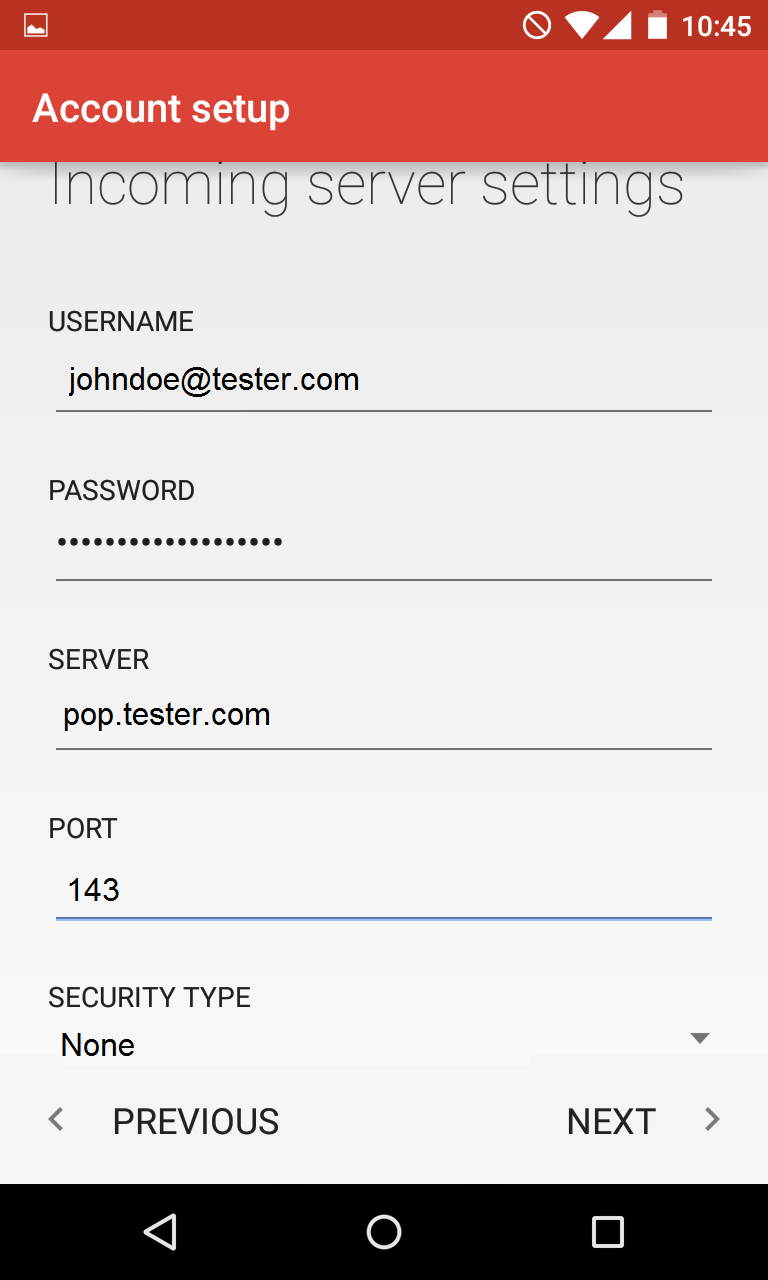
5. Enter the information as per the instructions provided on the following screen:
User name: <Complete Email address>
Password: <Email Password>
*** For IMAP Configuration
IMAP Server: ******.mailshelter.com
Port: 993
*** For POP Configuration
POP Server: *******.mailshelter.com
Port: 995
Security Type: SSL
Click on Next
6. Enter the information as per the instructions provided on the following screen:
SMTP Server: *****.mailshelter.com
Port: 465
Security Type: SSL/TLS
Require sign-in: yes
Click on Next
User name: <Complete Email address>
Password: <Email Password>.
Click on Next
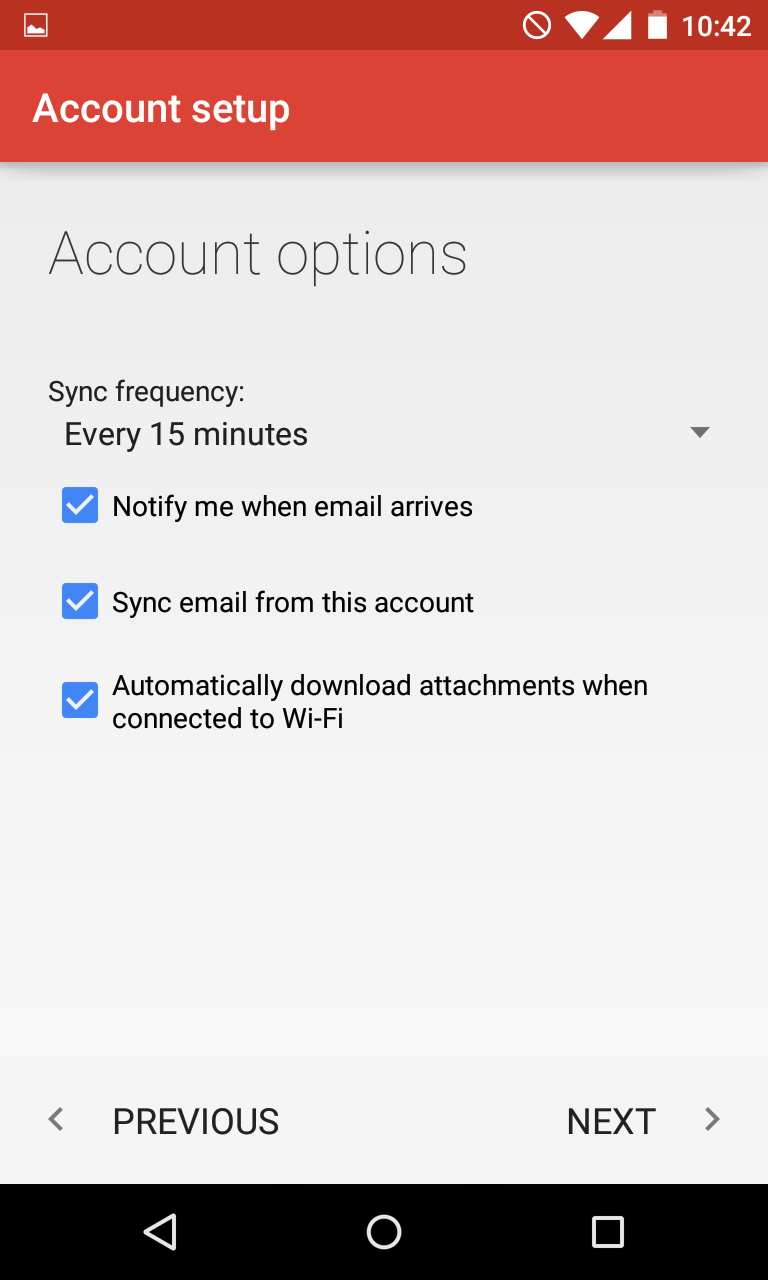
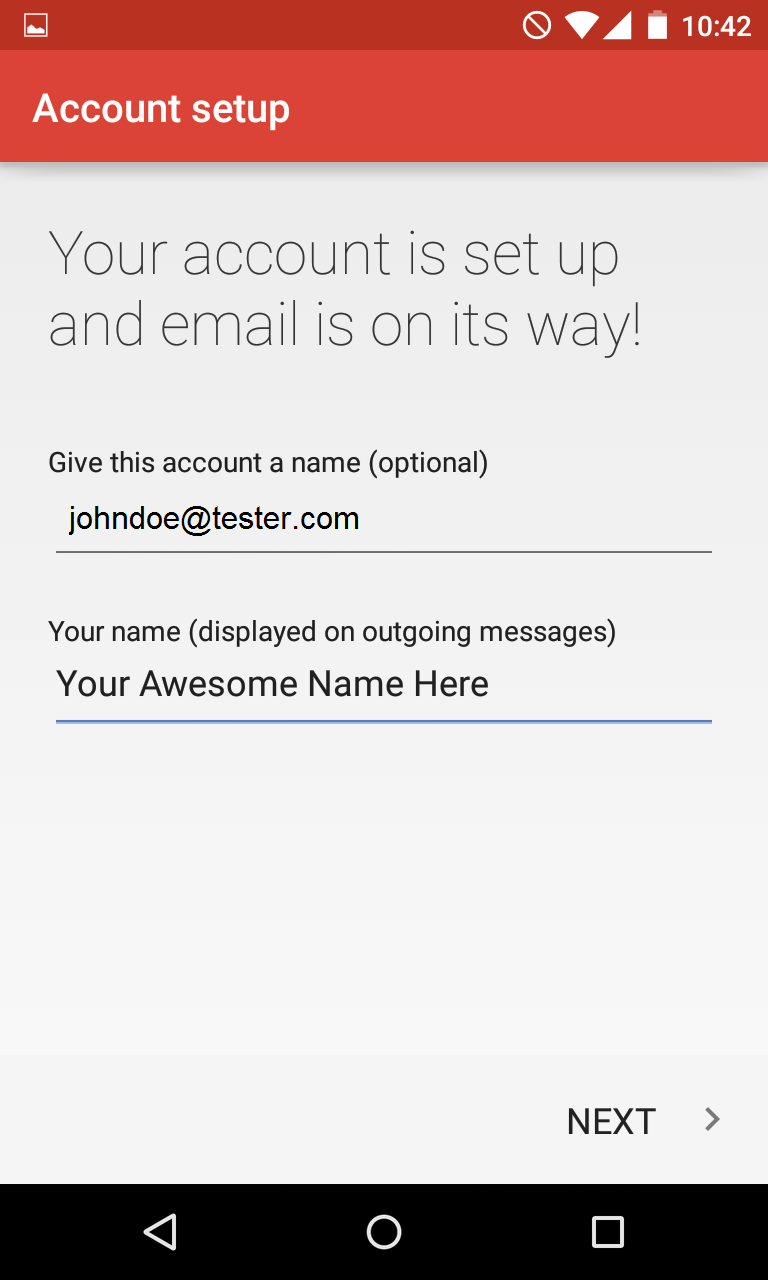
7. Select ‘Email check frequency’ ‘Notify me when email arrives’ according to your preference.
8. Give an account name for the configuration (optional).
Enter Your Name and click on Done.
9. You have successfully setup an email account on your Android Device.
You may try sending/receiving a test email from the email application.
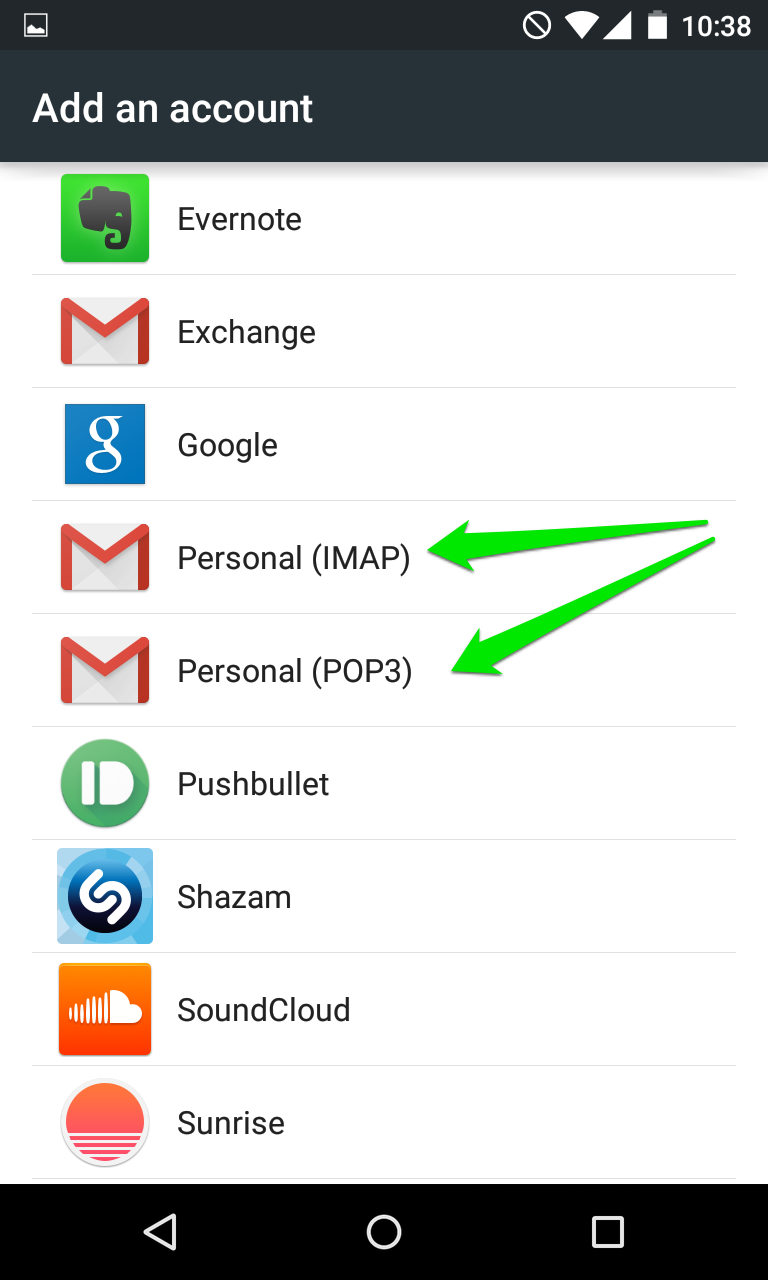
1B. CONFIGURE YOUR MAIL ACCOUNT ON ANDROID MOBILE DEVICE (Lollipop 5.x.x onwards):
To set up Email account via IMAP/POP3/SMTP protocols, do the following:
1. Open Settings of your Android device and tap on Accounts menu in section Personal:
2. Tap on Add Account at the very bottom of the screen:
3. On the next screen you will need to choose whether you wish to
configure IMAP or POP3 account. Simply choose the desired option by
tapping on Personal (IMAP) or Personal (POP3):
4. The next screen will prompt you to enter your email address.Make sure to type in full Email address:
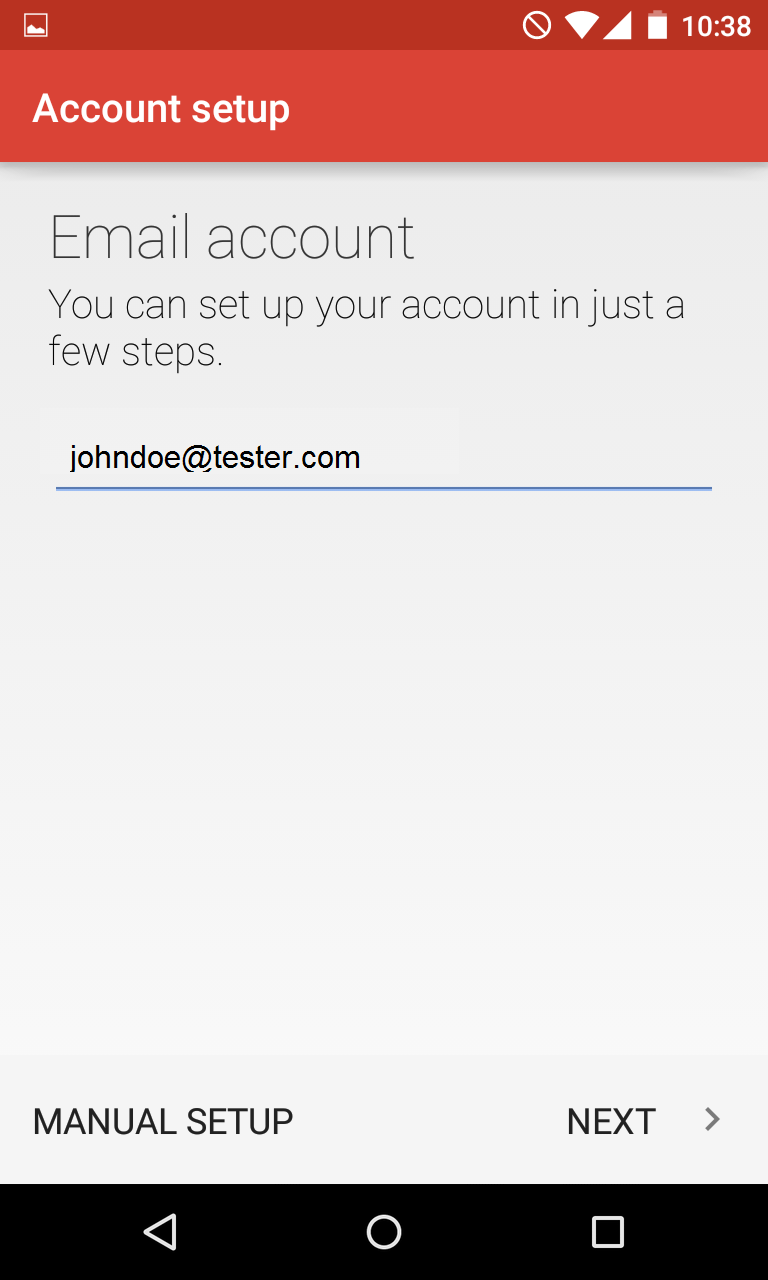
5. Once done, tap Next to proceed to the next step.
6. Here you will need to indicate your email account password.
7. Here you will need need to type in correct IMAP/POP3 settings
depending on the option you choose. Make sure to use the following
settings for IMAP:
Username: full email address
Password: password for this mailbox
Server: *****.mailshelter.com
IMAP Port: 993
Security Type: SSL/TLS (Accept All certificates)
8. If you decided to use POP3 protocol, the following settings should be used:
Username: full email address
Password: password for this mailbox
Server: ****.mailshelter.com
POP3 Port: 995
Security Type: SSL/TLS (Accept All certificates)
9. Once done, tap Next to verify the settings and proceed to Outgoing Server settings menu.
10. Here you will need to fill in the corresponding fields as shown below:
SMTP Server: *****.mailshelter.com
Port: 465
Security Type: SSL/TLS (Accept All certificates)
Username: full email address
Password: password for this mailbox
11. Once ready, tap Next to verify SMTP settings and finish the account setup:
2. CONFIGURE YOUR MAIL ACCOUNT ON iOS DEVICE (iPHONE) with IOS 7 and newer :
From the Home screen, choose Settings.

Next, tap Passwords & Accounts (in older versions of iOS, tap Mail, Contacts, Calendars).
In the Accounts section, tap Add Account.
Choose your email account type. For setting up email to work with IzzyMail, choose Other.

Select Add Mail Account under the Mail section.

Enter your account information.

On the next screen, enter your account details.


Incoming Mail Server
For POP protocol
Host Name: ******.mailshelter.com
Port: 995 (the phone should set this automatically)
User Name: john@yourdomain.com
Password: If you do not know your password, you can reset it from the mailadmin interface for your mailserver
For IMAP protocol
Host Name: *****.mailshelter.com
Port: 993 (the phone should set this automatically)
User Name: john@yourdomain.com
Password: If you do not know your password, you can reset it from the mailadmin interface for your mailserver
Outgoing Mail Server (SMTP)
Host Name: *****.mailshelter.com
Port: 465 (the phone should set this automatically)
User Name: john@yourdomain.com
Password: If you do not know your password, you can reset it from the Admin Email Interface panel.
Once the email configuration is added, tap Next to continue.
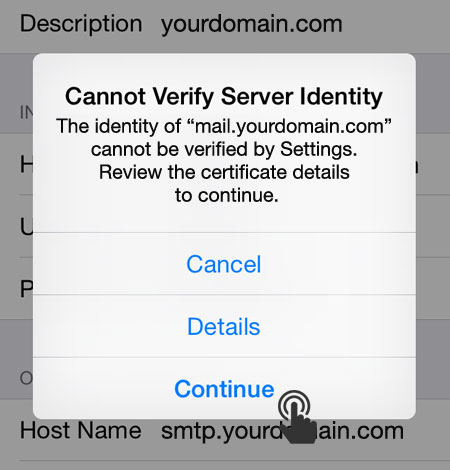
After you fill in each section for
the incoming and outgoing server, your phone will attempt to verify the
server. If you see this warning, please click on Details. You will
then see the details for the certificate in use. Make sure to select to
trust the certificate. The certificate is a self-signed certificate
used by the mail server. The certificate information should show that it is
coming from your mail server. If it is, then click the options to trust
the certificate and then your iPhone will be able to confirm the
server.
Congratulations your account information is now setup successfully !!

Upon successful completion, you will be taken back to the Mail screen. Your account will now be listed in the Accounts section.
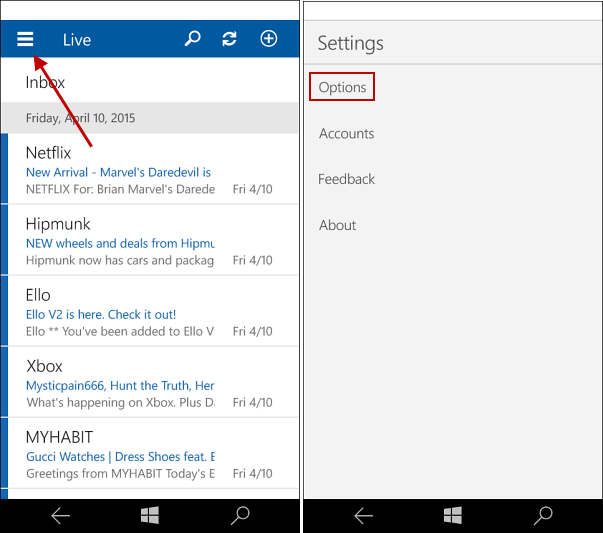
4. Configure Your Mail Account On Windows Mobile Device :
1. Swipe left to view the Apps list.
2. Tap Settings.
3. Tap Email + Accounts.
4. Tap Add an Account.
5. Tap Advanced Setup
6. Enter your Email address e.g.
johndoe@letsguide.it.
Password is the password that you selected for the email account in the Control Panel.
Tap Next.
7. Tap Internet email.
8. Enter an Account name, this is only a description to identify this e-mail account. You can enter anything here.
Enter Your name, this will be shown to people receiving emails from you.
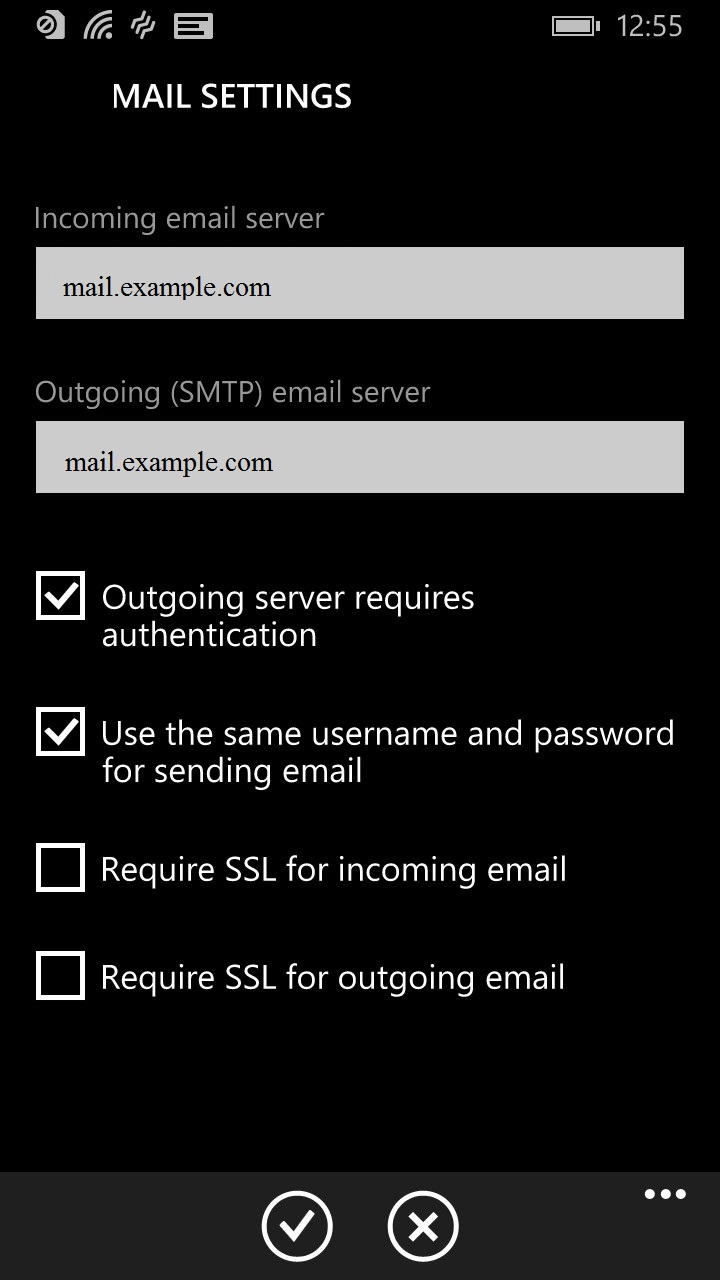
For Incoming email server enter: *****.mailshelter.com
Enter your email address as Username as your complete email address e.g.
johndoe@letsguide.it.
Password is the password that you selected for the email account in the Control Panel.
Scroll Down.
9. For Outgoing (SMTP) email server enter: *****.mailshelter.com
b. Check Use the same username and password for sending email.
c. Check Require SSL for incoming email.
d. Check Require SSL for outgoing email.
10. Download new content : You
can use this setting to download new emails in equal intervals of time
as per your choice. You can select from the following options :
a. every 15 minutes
b. every 30 minutes
c. hourly
d. every 2 hours
e. manually
11. Download email from : You can use this setting to
download previous emails. You can select from the following options :
a. the past 7 days
b. the past 2 weeks
c. the past month
d. anytime.
12. Setup is now done. Tap sign in and you should be good to go !!